A autostigmatic microscope is used to measure the radii of small lenses,both concave and convex.

|
ASM+OSA+Webinar+Slides.pdf Size : 2064.86 Kb Type : pdf |
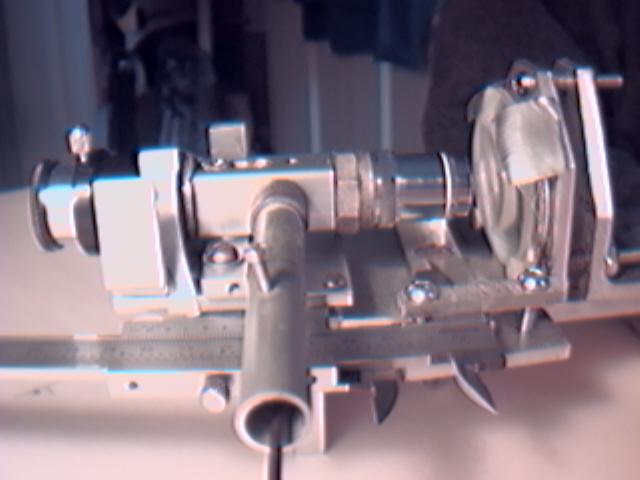
Here is the basic layout of the instrument that I made.
On the left we have a 9mm Ramsden eyepiece with a built in reticle.The central square section houses a 10mm cube beamsplitter that is mounted (with double sided tape ) on a moveable slide.On the right there is a 10X microscope objective.For large faster concave mirrors a microscope objective up to 20X can be used for a wider beam spread. For inital alignment one can use a much lower power eyepiece ,say 40mm to find the image.Then align things for the higher power eyepiece.
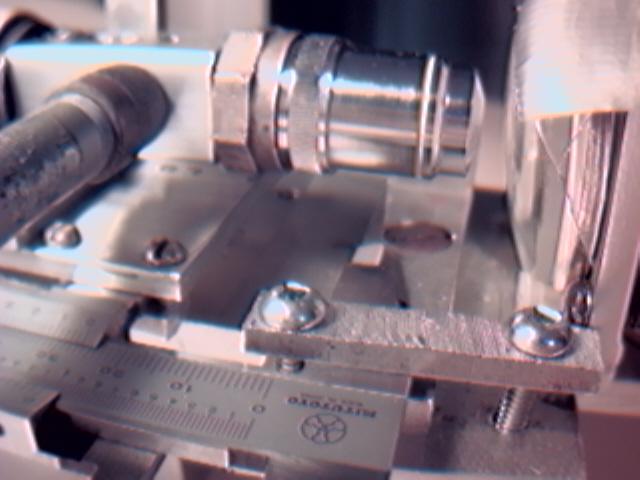
The long tube in the foreground houses a #222 filament flashlight bulb.The bulb has a "focused" lens - a blob of glass.Make sure the "blob" is straight and not off angle.
The spacing of the bulb is important.The bulbs spacing to the centre of the beamsplitter must equal the distance from the Ramsden's reticle to the centre of the beamsplitter .
To verify the equal spacing,first focus on a piece of flat glass that has some scrathes on it or dust.Then turn on the light and without moving the eyepiece move the bulb in it's housing until you see a clean clear image of the bulb filament aswell.
In my setup I used a 6 inch vernier caliper.The main microscope assembly is clamped to the moveable jaw of the caliper.The fixed jaw of the caliper is clamped to the base of the instrument as seen below.
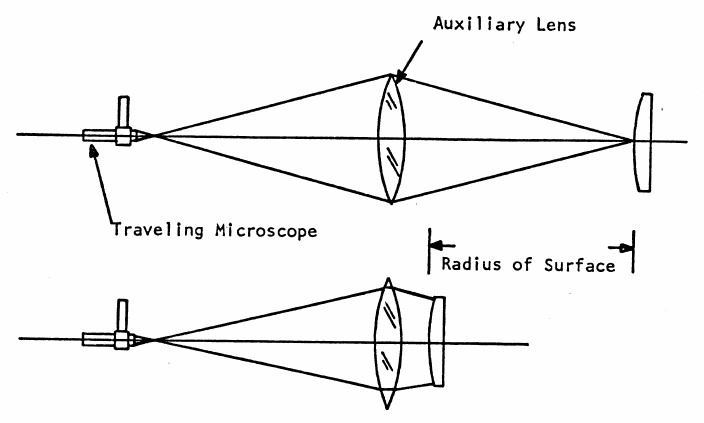
In use you move the instrument up to the center of the lens.Looking into the eyepiece you look for a clear focused image of the filament from the #222 bulb.Read the setting on the caliper.You then move the instrument back until you again see the filament of the bulb again.Read the setting on the caliper.The difference between the two readings is the lens radius.
You can achieve an accuracy of a thousands of an inch.In use you need to decide what part of the bulb filament to use as the reference.You can actually focus on the near side of the filament or the edge,but use the same location for all measurements.
For convex surfaces the microscope objective needs to have a longer focal lenght to get closer to the convex surface.The return image is very faint for a convex surface.
One needs to have an adjustable mount for holding the small lens.It helps to roughly know the lens radius to start.Use a small white card around the microscope objective to align the return beam.Can be frustrating.
This setup can be used to measure the radius of any concave mirror to a high level,which is needed in designing a Offner or Ross null system.In these null test an accuracuy of at least 2mm in radius is required for the main mirror.
A detailed article on this type of microscope appears in ATM Book III page 200.
On the left we have a 9mm Ramsden eyepiece with a built in reticle.The central square section houses a 10mm cube beamsplitter that is mounted (with double sided tape ) on a moveable slide.On the right there is a 10X microscope objective.For large faster concave mirrors a microscope objective up to 20X can be used for a wider beam spread. For inital alignment one can use a much lower power eyepiece ,say 40mm to find the image.Then align things for the higher power eyepiece.
The long tube in the foreground houses a #222 filament flashlight bulb.The bulb has a "focused" lens - a blob of glass.Make sure the "blob" is straight and not off angle.
The spacing of the bulb is important.The bulbs spacing to the centre of the beamsplitter must equal the distance from the Ramsden's reticle to the centre of the beamsplitter .
To verify the equal spacing,first focus on a piece of flat glass that has some scrathes on it or dust.Then turn on the light and without moving the eyepiece move the bulb in it's housing until you see a clean clear image of the bulb filament aswell.
In my setup I used a 6 inch vernier caliper.The main microscope assembly is clamped to the moveable jaw of the caliper.The fixed jaw of the caliper is clamped to the base of the instrument as seen below.
In use you move the instrument up to the center of the lens.Looking into the eyepiece you look for a clear focused image of the filament from the #222 bulb.Read the setting on the caliper.You then move the instrument back until you again see the filament of the bulb again.Read the setting on the caliper.The difference between the two readings is the lens radius.
You can achieve an accuracy of a thousands of an inch.In use you need to decide what part of the bulb filament to use as the reference.You can actually focus on the near side of the filament or the edge,but use the same location for all measurements.
For convex surfaces the microscope objective needs to have a longer focal lenght to get closer to the convex surface.The return image is very faint for a convex surface.
One needs to have an adjustable mount for holding the small lens.It helps to roughly know the lens radius to start.Use a small white card around the microscope objective to align the return beam.Can be frustrating.
This setup can be used to measure the radius of any concave mirror to a high level,which is needed in designing a Offner or Ross null system.In these null test an accuracuy of at least 2mm in radius is required for the main mirror.
A detailed article on this type of microscope appears in ATM Book III page 200.
Translate This Page
Below are the setups for testing concave and convex lenses.
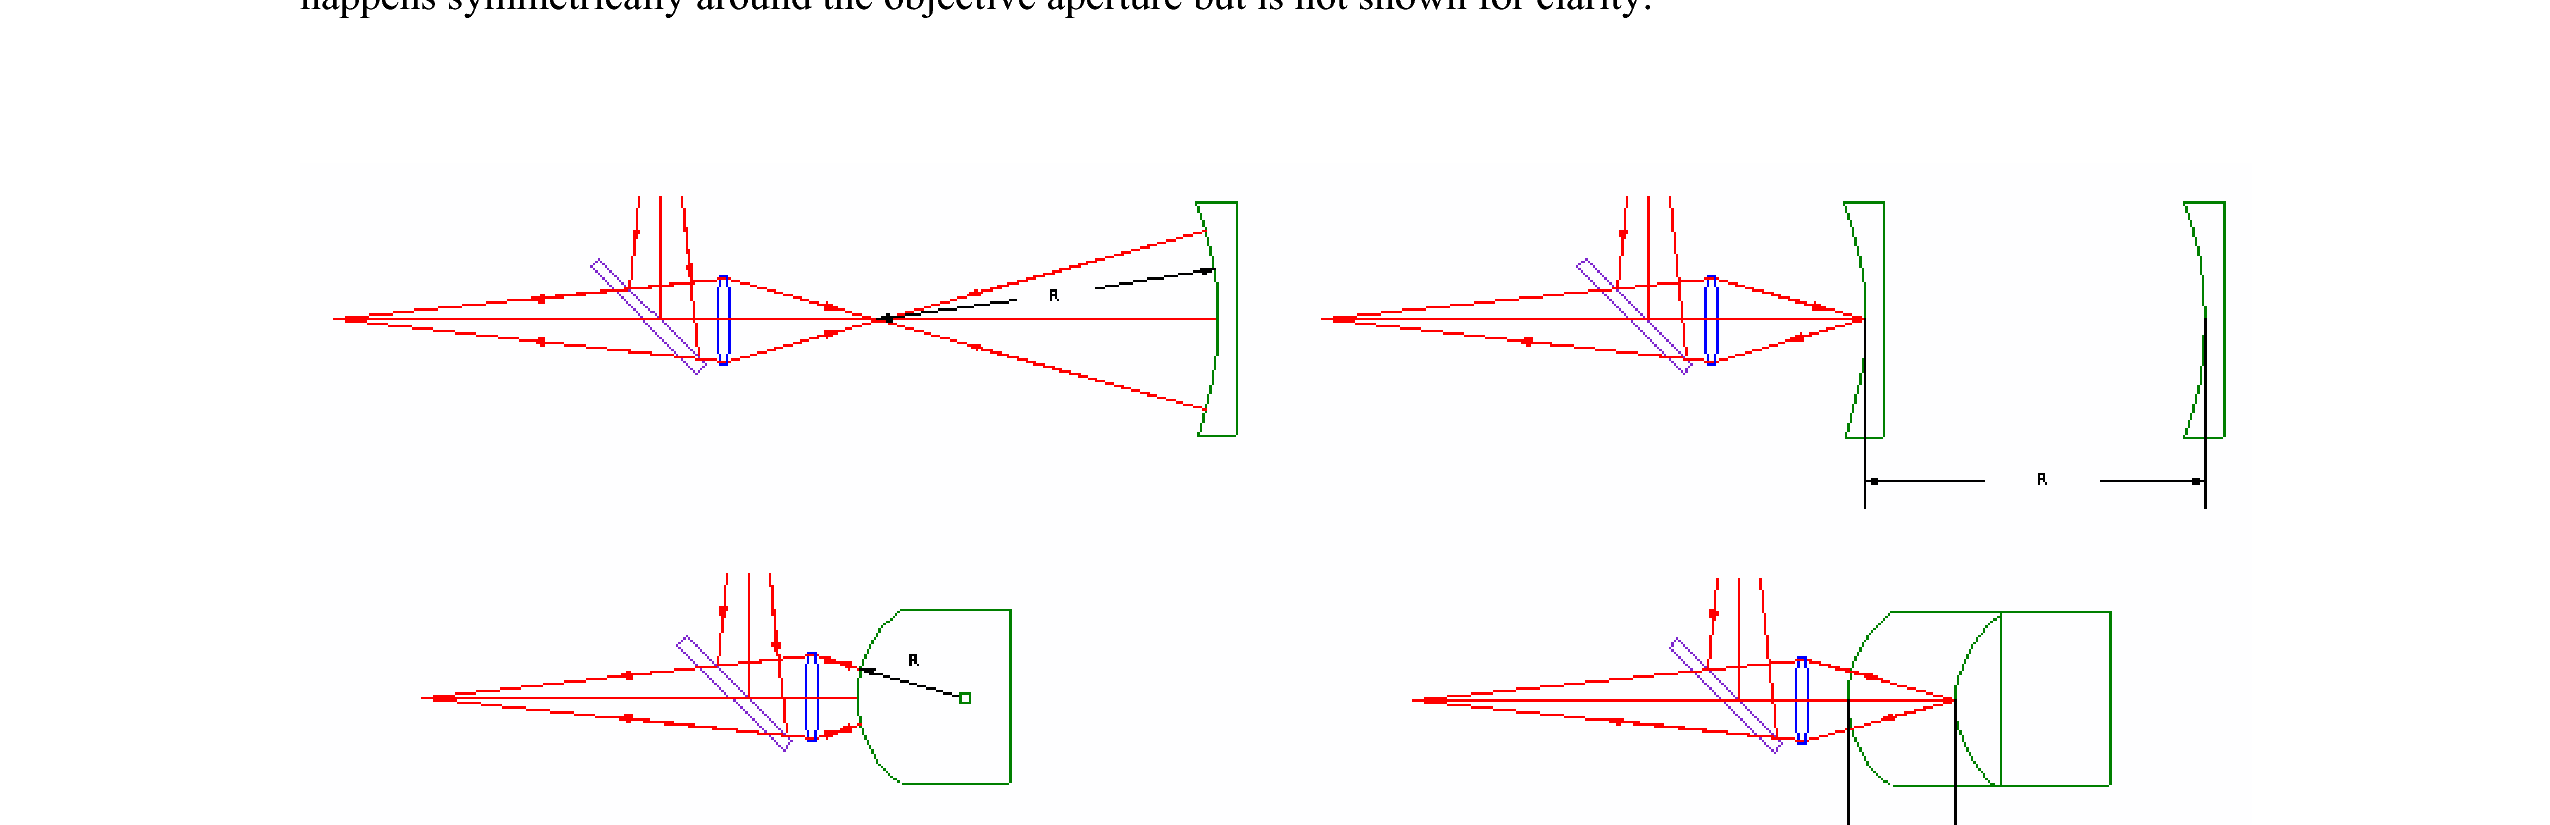
Below is one other layout for testing convex surfaces.